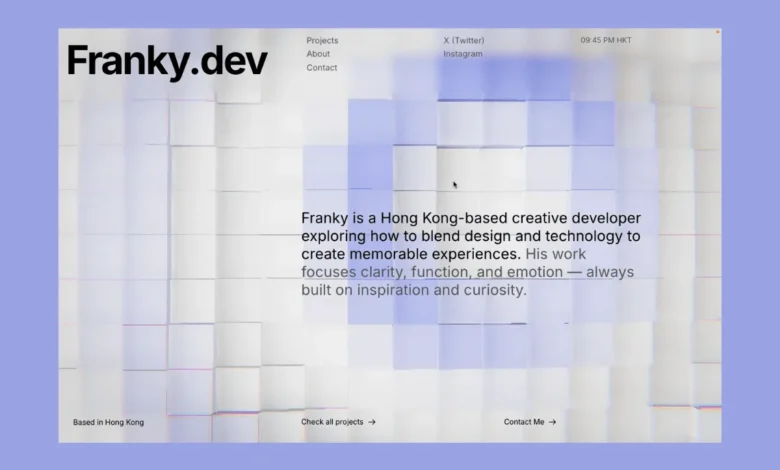
Franky Hung, a creative frontend developer based in Hong Kong, has released a detailed tutorial showcasing the creation of a minimalistic yet mesmerizing 3D wave propagation cube grid background using the Three.js library. The project, inspired by a visually captivating animation discovered on Pinterest, demonstrates how to implement dynamic wave effects that react to user interaction, offering a sophisticated aesthetic for web experiences.
The core of the tutorial revolves around constructing an interactive grid where cubes respond to mouse movements, generating ripples that propagate across the surface. This is achieved through a combination of Three.js’s rendering capabilities, instanced meshes for efficient rendering of multiple objects, and custom shader programming for dynamic visual effects. Hung’s approach emphasizes a structured coding methodology, drawing inspiration from established development patterns to ensure maintainability and scalability.
Project Genesis and Technical Foundation
The genesis of this project stemmed from Hung’s exploration of visual inspirations online. "One day, I was scrolling on Pinterest looking for inspirations and I stumbled upon a very cool animation showcasing waves propagating across a grid of cubes with realistic shadows," Hung stated. "I thought to myself, ‘that doesn’t seem too hard to recreate in Three.js, why not consider it a small challenge?’" This curiosity and desire for technical challenge led to the development of the comprehensive tutorial.
For the project’s build process, Vite was selected as the bundler. Vite is a modern, high-performance frontend build tool that significantly accelerates development workflows through its rapid hot module replacement and optimized build outputs. The project structure is meticulously organized, with Three.js-related code encapsulated within a dedicated ThreeJS folder, promoting modularity and ease of navigation. Key components include Camera.js, Orchestrator.js, Renderer.js, and Stage.js, each responsible for specific aspects of the 3D scene management. Additional subfolders for Effects and Utils further compartmentalize specialized functionalities.

The script.js file serves as the application’s entry point, orchestrating the initialization of the Three.js scene and its integration with the HTML canvas. The project’s architecture is notably influenced by the pedagogical approach of Bruno Simon, a prominent figure in WebGL and Three.js education, suggesting a focus on best practices and robust scene setup.
Constructing the Interactive Grid
The foundational element of the visual experience is a grid of cubes. To efficiently render a large number of identical objects, the tutorial employs instancing. While the tutorial does not necessarily render thousands of cubes, instancing allows for the consolidation of numerous draw calls into a single one, dramatically improving performance. For this particular aesthetic, a fraction of a larger potential grid of 400 cubes is rendered, with emphasis on larger cube dimensions.
To achieve realistic shadows, the MeshPhongMaterial is utilized. This material offers a good balance between visual fidelity and performance for non-physically-based rendering scenarios, making it suitable for the relatively simple surfaces of the cubes without requiring the more computationally intensive MeshStandardMaterial.
The setGrid function within the Stage.js class is central to this setup. It defines the geometry and material for the instanced mesh. A crucial aspect is the introduction of a custom InstancedBufferAttribute named aOffset. This attribute serves a dual purpose: it acts as a unique identifier for each cube instance and stores its 2D world position (X and Z coordinates). This information is vital for subsequent shader calculations, enabling precise positioning and interaction.
To ensure that the cubes cast and receive shadows, the castShadow and receiveShadow properties of the instancedMesh are set to true. This is a fundamental requirement for creating a sense of depth and realism within the 3D environment.

Illuminating the Scene and Shadow Mapping
Effective lighting is paramount for any 3D scene, especially when shadows are a key visual component. The setLighting function establishes a DirectionalLight, which simulates light coming from a distant source like the sun. For shadows to be rendered correctly, the castShadow property of this light must also be enabled.
Shadow mapping is configured with a shadow.mapSize of 1024x1024. This parameter dictates the resolution of the shadow map generated by the light. Optimizing this value is a common practice; the resolution should be set to the minimum acceptable level to avoid unnecessary computational overhead, while still maintaining visual quality. The shadow.radius is adjusted to 6 to produce softer, more diffused shadows.
Furthermore, the renderer’s main shadow map is enabled by setting this.instance.shadowMap.enabled = true and specifying the shadow map type as THREE.PCFShadowMap. The PCFShadowMap (Probabilistic Shadow Maps) method provides a good balance between visual quality and performance for rendering shadows. It’s important to note that PCFSoftShadowMap was deprecated in later versions of Three.js, making PCFShadowMap the recommended alternative for softer shadows.
Implementing Dynamic Mouse Trail Interaction
The static grid is brought to life through interactive wave propagation, triggered by the user’s mouse movements. The MouseTrail.js class is responsible for translating the 2D cursor position into a 3D world coordinate and managing the data that drives the wave effect.
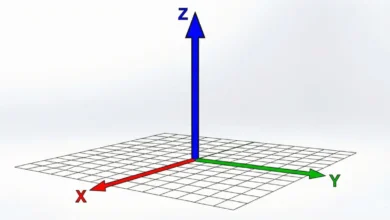
A core technique employed here is Three.js’s Raycaster. This tool allows developers to cast a ray from a point in the scene, typically from the camera through the mouse cursor’s position, and detect intersections with objects. In this implementation, a Raycaster is used in conjunction with an invisible, horizontal plane positioned at y = 0, aligning with the grid. This plane acts as a consistent surface for ray intersections, enabling the accurate determination of the mouse’s (x, z) coordinates within the 3D space.

The rayPlane is constructed using a PlaneGeometry and a MeshBasicMaterial with visible: false to keep it hidden from the camera. Its rotation around the X-axis by -Math.PI / 2 makes it horizontal. A critical step is calling rayPlane.updateMatrixWorld(true) after rotation. This is necessary because Three.js does not automatically update the world matrix of invisible objects when their transformation changes.
The trail data itself is managed through a Float32Array and a THREE.DataTexture. This DataTexture is a specialized texture format that allows direct manipulation of pixel data, making it highly efficient for transferring dynamic information to the GPU. The texture is configured with MAX_TRAIL (typically 128) by 1 dimensions, using RGBA float format to store four pieces of data per trail point: its x and z world coordinates, its age (how long it has existed), and its distDelta (the distance the mouse has moved since the last point was recorded). This distDelta is crucial for controlling wave intensity based on movement speed.
When a pointermove event occurs, the MouseTrail class captures the cursor’s normalized screen coordinates, uses the Raycaster to find the intersection point with the rayPlane, and records this as a new trail point. New points are only added if the mouse has moved a minimum distance (trailSpacing) to prevent excessive data points when the mouse is nearly stationary.
Animated Waves and Shader Manipulation
The core visual magic happens within the vertex shader, where the mouse trail data is used to displace the cubes and create the wave effect. Three.js’s onBeforeCompile hook for materials provides a powerful mechanism to inject custom GLSL code into the shaders without rewriting them entirely.
The overrideVertexShader method within Stage.js modifies the default vertex shader. It iterates through each active trail point stored in the uTrailTexture. For each cube instance and each trail point, the distance between the cube’s world position and the expanding wavefront of the trail point is calculated. This distance, combined with parameters like wave speed and age, determines the displacement.

A Gaussian function is employed to create a smooth, bell-shaped wave envelope. This ensures that the wave’s influence is strongest at the wavefront and gradually diminishes as it moves away. The wave’s shape is further refined by factors like:
- Time Fade: Trail points lose influence exponentially as they age, controlled by the
uFadeTimeuniform. - Distance Attenuation: The wave’s effect weakens with increasing distance from the trail point.
- Speed Attenuation: The
distDeltarecorded in the texture is used to modulate wave strength, preventing overly large waves from slow mouse movements.
The final wave height for each vertex is calculated using a weighted average of contributions from multiple trail points. This prevents chaotic superposition when waves overlap, leading to a more cohesive and visually pleasing effect. A jitter effect, based on a hash function of the cube’s offset, can be applied to break up the perfect circularity of the waves, adding a subtle organic quality.
Color Mixing and Shadow Synchronization
The visual appeal of the waves is significantly enhanced by a dynamic color mixing technique. The calculated wave height (vHeight) is passed from the vertex shader to the fragment shader. This height value is then used to interpolate between a base color (uColorBase) and a highlight color (uColorHigh). This creates a gradient effect where the peaks of the waves glow with the highlight color, while the rest of the wave transitions smoothly towards the base color.
Crucially, for the shadows to align perfectly with the deformed cubes, the same vertex shader logic must be applied to the shadow map generation pass. Three.js facilitates this by allowing the assignment of a customDepthMaterial to an InstancedMesh. A separate MeshDepthMaterial is created, and its onBeforeCompile function is used to inject the identical wave propagation shader code. This ensures that the shadows accurately reflect the wave deformations, preventing visual artifacts.
The background color of the scene is dynamically adjusted to match the uColorBase. This prevents jarring dark flashes in the gaps between cubes as the waves move. The background color is set to 0.5 the value of uColorBase for a more subtle integration.

Post-Processing Enhancements
To further refine the visual aesthetics, post-processing effects are applied. This involves using Three.js’s EffectComposer to chain together full-screen filters. For this project, a custom shader, VignetteRGBShiftShader.js, is developed. This shader combines a vignette effect (darkening the screen edges) with chromatic aberration (color channel splitting).
The custom shader cleverly uses the vignette as a mask to control the intensity of the chromatic aberration. The color channels are sampled with an offset that is scaled by the vignette factor, creating a dynamic RGB shift that is more pronounced towards the edges of the screen. Additionally, a standard darkening vignette is applied as an overlay, and the overall color is modulated by a darken factor derived from the vignette mask, contributing to a stylized, retro-futuristic look.
The EffectComposer is set up with essential passes: a RenderPass to render the main scene, the custom VignetteRGBShiftShader pass, and an OutputPass to display the final rendered image. Uniforms within the VignetteRGBShiftShader allow for fine-tuning of the shiftAmount, vignetteRadius, and vignetteSoftness to achieve the desired visual impact.
Production-Ready Optimizations and Mobile Considerations
For production deployment, several optimizations were implemented. These include:
- Code Splitting: Breaking down the JavaScript bundle into smaller chunks to improve initial load times.
- Texture Compression: Utilizing compressed texture formats to reduce memory usage and bandwidth.
- Level of Detail (LOD): Potentially implementing LOD techniques to reduce geometric complexity for objects further from the camera, though not explicitly detailed for this cube grid.
- Performance Profiling: Thoroughly testing and profiling the application to identify and address performance bottlenecks.
- Caching: Leveraging browser caching mechanisms for assets like textures and shaders.
A significant challenge addressed is the lack of mouse input on mobile devices. To ensure interactivity on touchscreens, a workaround was implemented. After three seconds of inactivity, random points are added to the trail, simulating wave propagation. This automatic wave generation stops once the user interacts with the screen via touch or mouse movement. The isPlacingRandomPoint flag is initially set to true to ensure that waves begin to ripple even before any user interaction occurs on mobile devices. This thoughtful adaptation ensures a visually engaging experience across a wide range of devices.

Customization and Creative Exploration
The tutorial concludes by encouraging customization, highlighting how various parameters can be tweaked to alter the visual style of the wave grid. By adjusting values such as wave speed, width, frequency, fade time, jitter, and color palettes, users can create a diverse range of aesthetic outcomes, from subtle ripples to more dynamic and vibrant displays. The provided examples demonstrate the versatility of the system, showcasing different color schemes and wave behaviors.
This project not only serves as an educational resource for developers interested in Three.js and interactive 3D graphics but also offers a tangible example of how complex visual effects can be achieved with a structured approach to coding and a deep understanding of shader programming. The successful integration of user interaction, dynamic animation, and sophisticated visual styling makes this wave propagation cube grid a compelling demonstration of modern web graphics capabilities.